
To put your project on GitHub from a Windows PC, you need four things: install Git for Windows from git-scm.com, tell Git your name and email once, create an empty repository on GitHub, and then run five commands inside your project folder: git init -b main, git add ., git commit, git remote add origin and git push -u origin main. The first push opens a browser window where you sign in to GitHub. You do not need to make a password token by hand. The whole job takes about 15 minutes.
This guide walks through every step in order, with the exact commands, the menu clicks on GitHub, and the mistakes that stop most beginners on their first push. Every command here comes from the official Git and GitHub documentation linked at the end.
What You Need Before You Start
- A Windows PC (64-bit is the normal case; an ARM64 installer also exists).
- A free GitHub account. Sign up at github.com if you do not have one.
- A project folder with some files in it, for example
C:\Users\YourName\Projects\my-portfolio. - About 15 minutes and a stable connection for the first push.
Step 1: Download and Install Git for Windows
Git is the tool that tracks changes on your computer. GitHub is the website that stores a copy online. You need Git first.
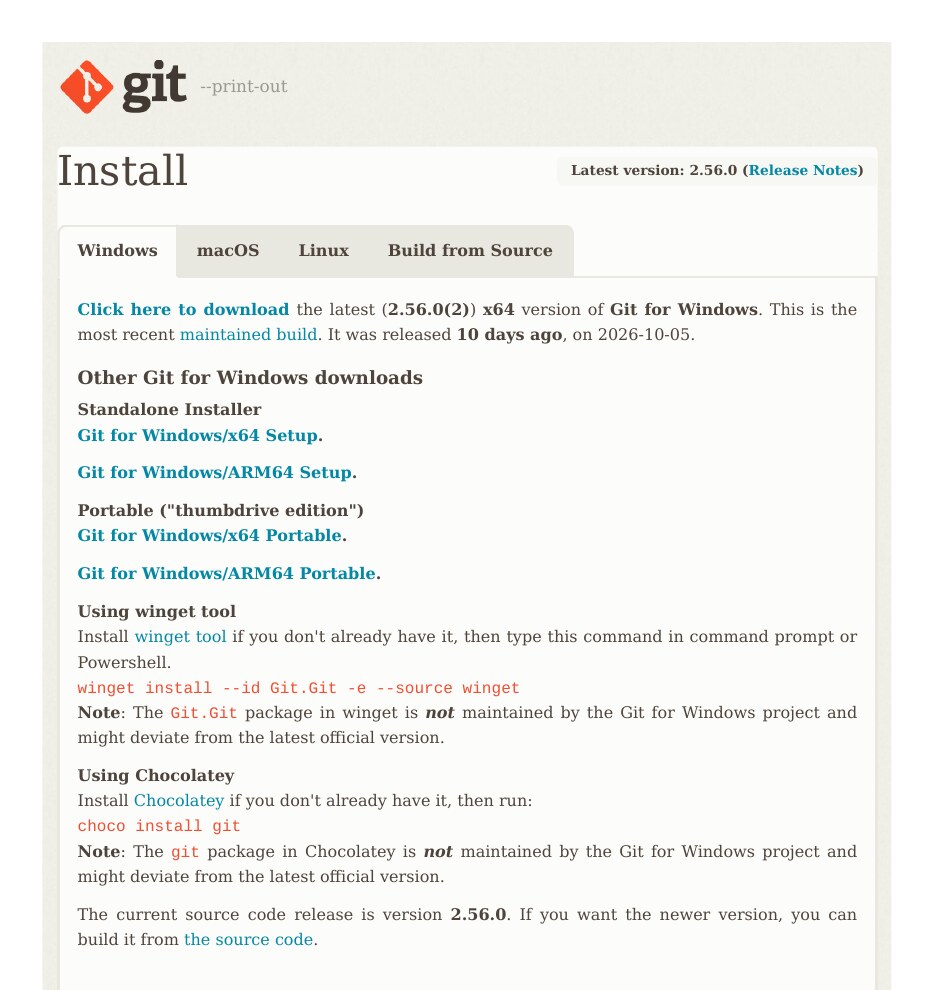
- Open git-scm.com/install/windows in your browser.
- Click Click here to download. On the day we checked (October 15, 2026), this gives the latest 2.56.0(2) x64 version of Git for Windows, released on 2026-10-05.
- If your laptop has an ARM chip (some newer thin laptops do), pick Git for Windows/ARM64 Setup from the same page instead.
- Run the downloaded
.exefile and click through the installer. If you are not sure about an option, keep the default. - When it finishes, open the Start menu, type Git Bash and open it.
Check that Git installed correctly. Type this in Git Bash and press Enter:
git --versionYou should see a line that starts with git version. If Windows says the command is not found, close Git Bash, open it again, and retry.
Step 2: Tell Git Your Name and Email (One Time Only)
Every commit you make carries a name and email. The Pro Git book says this information is baked into each commit permanently, so set it before your first commit. Run these two lines in Git Bash, using your own details:
git config --global user.name "Your Name"
git config --global user.email "you@example.com"
The --global part means Git will use these details for every project on this computer. You only do this once.
Next, set the default branch name to main. Without this, Git creates a branch called master in new repositories, while GitHub’s guide pushes to main. Setting a different name needs Git 2.28 or newer, which any fresh install already is.
git config --global init.defaultBranch mainCheck your settings any time with:
git config --listUse the same email as your GitHub account
If the email in user.email matches an email on your GitHub account, your commits show up linked to your profile. A different or misspelt email is the most common reason a beginner’s commits do not appear on their GitHub contribution graph.
Step 3: Create an Empty Repository on GitHub
A repository (or repo) is a project folder on GitHub. Follow the menu path from GitHub’s own documentation:
- Sign in at github.com.
- In the upper-right corner of any page, click the + icon, then click New repository.
- Under Owner, keep your own username.
- Type a Repository name, such as
my-portfolio. GitHub allows up to 100 characters, and only ASCII letters, digits, and the characters.,-and_. Spaces are not allowed. - Choose Public (anyone can see it) or Private (only you and people you invite).
- Leave README, .gitignore and license unticked.
- Click Create repository.
You will land on a Quick Setup page. Click the copy icon next to the repository URL. It looks like https://github.com/your-username/my-portfolio.git. Keep it ready for Step 5.
Why the repository must be empty
GitHub’s guide says that when you push existing code, you should not add a README, license or .gitignore while creating the repo, to avoid errors. If you tick them, GitHub makes a first commit that your laptop does not have, and your first push gets rejected. You can add a README later.
Step 4: Turn Your Project Folder into a Git Repository
Now go to your project folder inside Git Bash. Change the path below to your own folder. Windows paths with backslashes work in Git Bash if you keep the whole path in quotes:
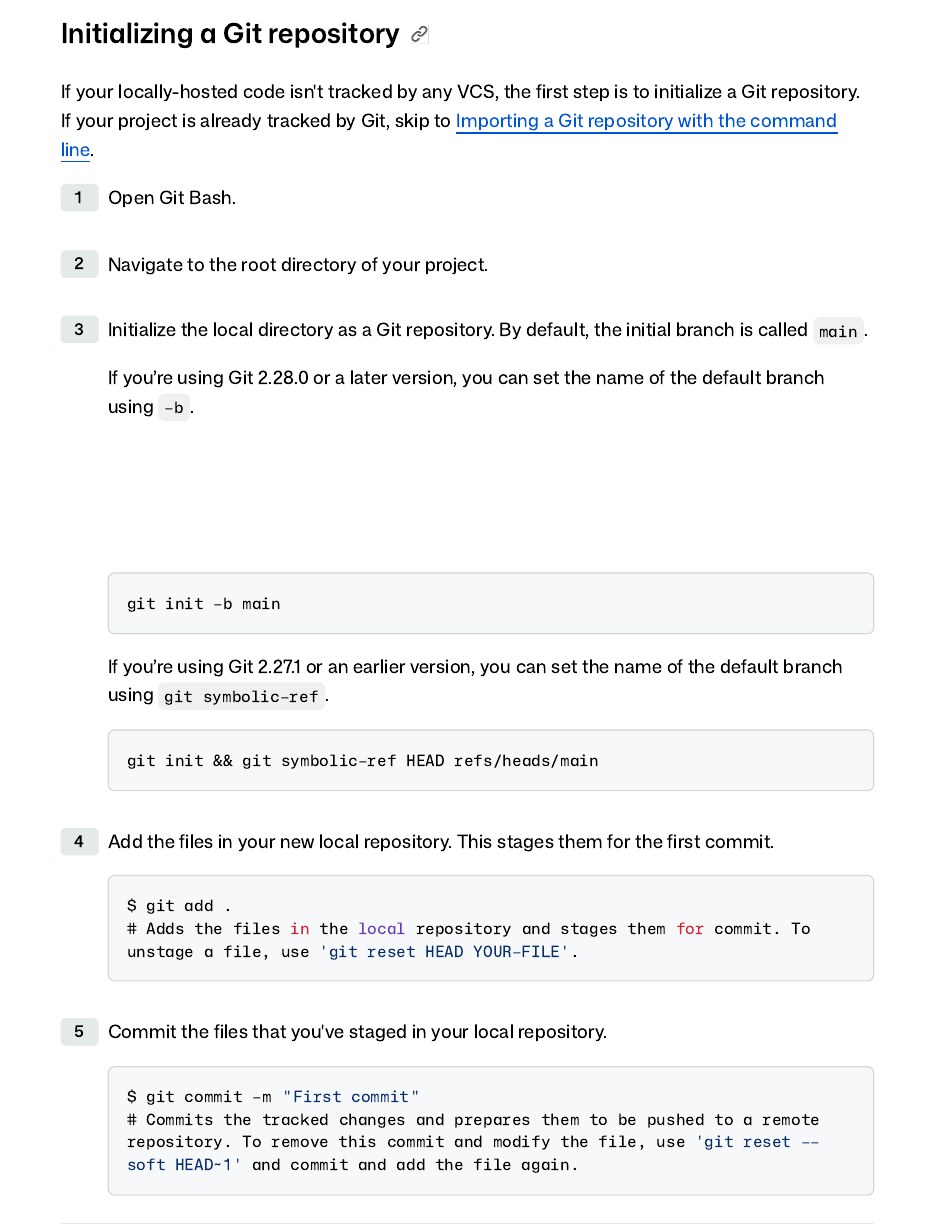
cd "C:\Users\YourName\Projects\my-portfolio"Then start Git tracking, add your files and make the first commit. These three commands come straight from GitHub’s “Adding locally hosted code to GitHub” guide:
git init -b main
git add .
git commit -m "First commit"
Here is what each line does:
git init -b maincreates a hidden.gitfolder and names the first branchmain.git add .stages every file in the folder for the first commit (the dot means “this folder”).git commit -m "First commit"saves a snapshot with a short message.
Keep secrets and junk out with .gitignore
GitHub warns that you should never add, commit or push sensitive information such as passwords or API keys. Before running git add ., create a .gitignore file in the root of your project and list the files Git should skip:
.env
node_modules/
__pycache__/
*.log
GitHub keeps ready-made .gitignore templates for many languages in the github/gitignore repository. If you already committed a file you want to ignore, untrack it first with:
git rm --cached FILENAMEStep 5: Connect to GitHub and Push
Paste the URL you copied in Step 3 in place of the example below, then push:
git remote add origin https://github.com/your-username/my-portfolio.git
git remote -v
git push -u origin main
git remote add originsaves the GitHub address under the short nameorigin.git remote -vshows the saved address so you can check it is correct.git push -u origin mainuploads yourmainbranch. The-ulinks your local branch to GitHub, so next time a plaingit pushis enough.
The first-time sign-in
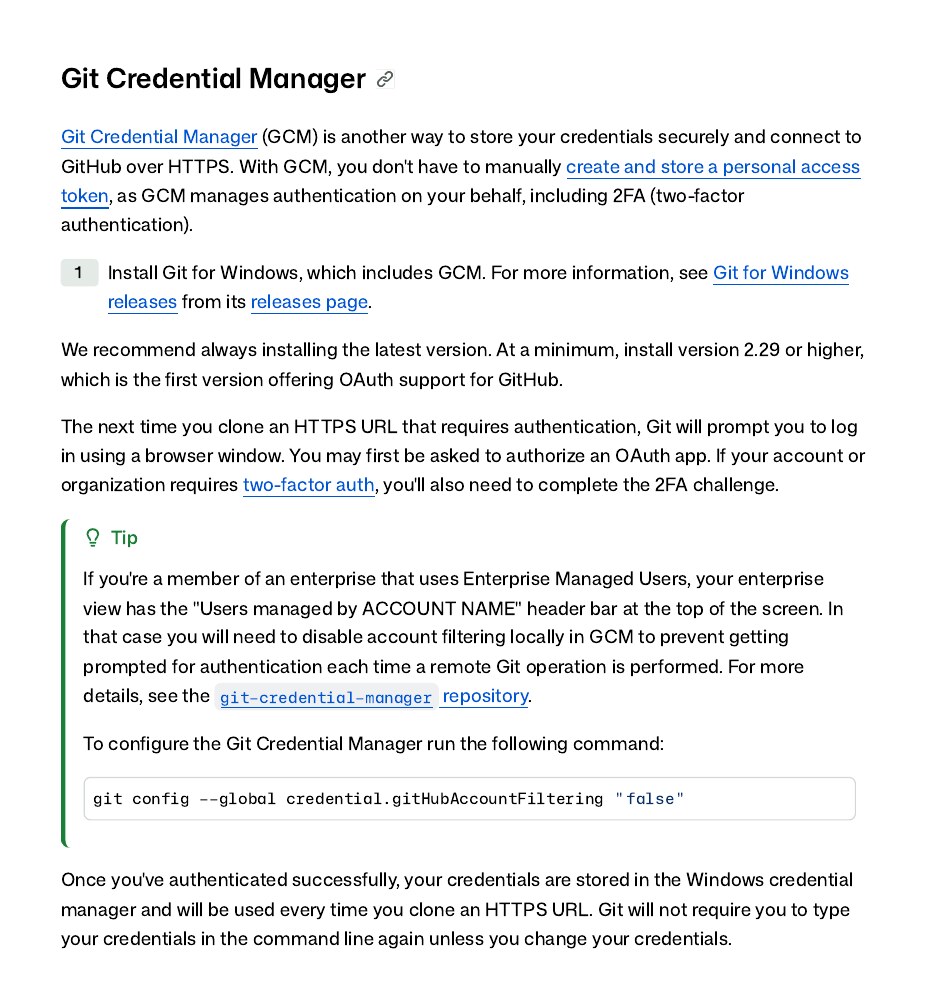
On the first push, a sign-in window appears. This comes from Git Credential Manager (GCM), which is included in Git for Windows. According to GitHub’s documentation, Git prompts you to log in using a browser window, you may be asked to authorise an OAuth app, and if your account uses two-factor authentication you complete that too. After that, your credentials are stored in the Windows Credential Manager and Git will not ask again unless they change.
Refresh your repository page on GitHub. Your files should now be there.
Daily Workflow After the First Push
Once the setup is done, saving new work to GitHub is three commands. Run them from inside the project folder whenever you finish a change:
git add .
git commit -m "Describe what you changed"
git push| Command | What it does | When you use it |
|---|---|---|
git config --global user.name | Sets your name on commits | Once per computer |
git init -b main | Starts tracking a folder | Once per project |
git add . | Stages all changed files | Before every commit |
git commit -m "..." | Saves a snapshot with a message | After each piece of work |
git remote add origin URL | Links the folder to GitHub | Once per project |
git push -u origin main | First upload and branch link | First push only |
git push | Uploads new commits | Every time after |
Easier Alternative: GitHub CLI
If you install GitHub CLI and sign in with gh auth login, one command can create the repository and push in one go. GitHub’s guide gives this example from inside your project folder (after git init and your first commit):
gh repo create --source=. --public --pushUse --private instead of --public if you do not want the code visible.
Common Mistakes
- Ticking “Add a README” on GitHub. The remote then has a commit you do not have, and the push is rejected. Create the repo empty, as in Step 3.
- Running commands in the wrong folder. If
git initruns in your home folder, Git tracks your whole user profile. Runpwdin Git Bash to see where you are before starting. - Pushing
masterwhen GitHub expectsmain. Setinit.defaultBranch mainin Step 2, or replacemainwith your actual branch name in the push command. - Typing your GitHub password in the terminal. Let the browser sign-in window handle it. GitHub recommends Git Credential Manager or GitHub CLI for HTTPS so you do not have to manage a token yourself.
- Committing a
.envfile or API keys. Add a.gitignorebefore your firstgit add .. Once a secret is pushed to a public repo, treat it as leaked and change it. - Old saved credentials. If Git keeps failing with the wrong account, open Control Panel > User Accounts > Credential Manager, find the GitHub entry and delete it. Git will ask you to sign in again on the next push.
FAQ
Is Git the same as GitHub?
No. Git is free software that runs on your computer and records versions of your files. GitHub is a website that hosts Git repositories online so you can back them up, share them and work with others. You can use Git without GitHub, but to push to GitHub you need Git (or a tool built on it).
Do I need a personal access token to push from Windows?
Usually not. Git for Windows includes Git Credential Manager, which signs you in through a browser window and handles two-factor authentication. GitHub’s documentation says GCM means you do not have to create and store a personal access token manually. GitHub recommends installing at least Git for Windows 2.29, the first version with OAuth support for GitHub; the current download is far newer.
Can I keep my college project private?
Yes. Choose Private when you create the repository in Step 3. Only you and the people you invite can see it. You can change visibility later in the repository settings.
Why does my push say “rejected” or “failed to push some refs”?
The most common reason for a first push is that the GitHub repository already has a commit, usually because a README was added when it was created. The simplest fix for a beginner is to delete that repository and create a fresh empty one, then push again.
Sources & Documentation
- Git for Windows download (git-scm.com): Git – Install for Windows
- Pro Git book (git-scm.com): 1.6 Getting Started – First-Time Git Setup
- GitHub Docs: Creating a new repository
- GitHub Docs: Adding locally hosted code to GitHub
- GitHub Docs: Caching your GitHub credentials in Git
- GitHub Docs: Ignoring files
Written & Verified by Sampath Anji
Sampath Anji is a technology researcher, systems developer, and digital creator based in Telangana, India. He specializes in on-device AI architectures, autonomous agent workflows, high-throughput inference engines, and digital media production. Every tutorial on ISMARTANJI CREATIONS is grounded in code reproducibility, verified documentation, and transparent test environments. Read our full testing methodology on our About Us page, or submit feedback and code updates via our Contact Desk.