
Short answer: Telegram will only send messages to a public HTTPS address, and a Telegram Trigger on your laptop registers http://localhost:5678, which Telegram cannot reach. Start a tunnel that gives you an HTTPS address, then start n8n with N8N_WEBHOOK_URL set to that address. Most people who still get the error did this in the wrong order, or the setting never reached the n8n process.
This question fills the n8n community forum. In threads like this one on ngrok and this one on a local install, people say they already installed a tunnel and still see the same red error, and the replies are short or end with a typo in the variable name. I checked the n8n, Telegram and Cloudflare docs on October 28, 2026, and I ran n8n 2.35.7 on a test machine to see what address it really registers in each setup.
Why Telegram Rejects Your Local n8n
Two separate things have to be true, and a laptop setup breaks both of them.
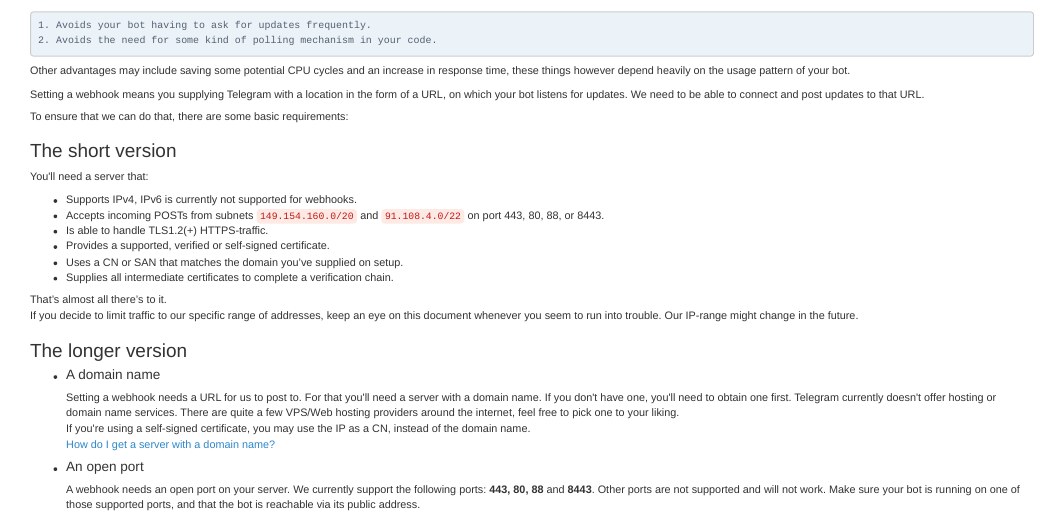
First, Telegram is strict. Its webhook guide says the address must be reachable from the internet over TLS 1.2 or newer, on port 443, 80, 88 or 8443, and that IPv6 is not supported for webhooks. Plain HTTP is never accepted. Second, n8n decides the address on its own. Unless you tell it otherwise, it builds the webhook address from its protocol, host and port, so on your PC it becomes http://localhost:5678/. The word localhost means “this same computer”, so even if Telegram accepted HTTP, it would be knocking on its own door.
You might think of opening a port on your home router. In India that often does not work, because many home broadband and mobile connections share one public address between many customers (carrier-grade NAT). A quick check: compare the WAN address shown in your router with the address a site like ifconfig.me shows. If they differ, forwarding a port will not help. A tunnel avoids this problem, because your PC makes an outgoing connection and the tunnel service gives you a public HTTPS name.
What n8n Registers in Each Setup (My Test Results)
I started n8n four ways on the same machine and read the webhook base address from n8n’s own settings after creating the owner account. This is the address that a trigger node sends to Telegram.
| How n8n was started | Webhook base address n8n used | Will Telegram accept it? |
|---|---|---|
| No extra settings | http://localhost:5685/ | No. HTTP and local |
N8N_WEBHOOK_URL set to an HTTPS tunnel name | The tunnel name, with https | Yes, if the tunnel is running |
WEBHOOK_URL (older name) | The old name’s value, with a deprecation warning at startup | Yes, it still works for now |
Only N8N_PROTOCOL and N8N_HOST | https://your-host:5678/ (the local port is added) | No. Telegram allows only ports 443, 80, 88 and 8443 |
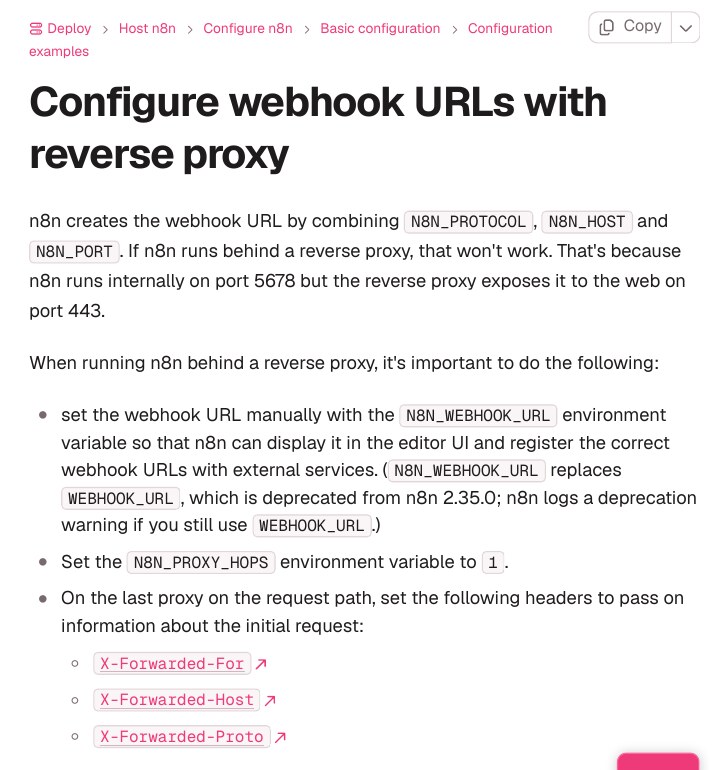
The first row explains the whole error. The second row is the fix. n8n’s current docs say N8N_WEBHOOK_URL replaces the older WEBHOOK_URL from version 2.35.0, so use the new name on a fresh install and expect a warning if you keep the old one. The last row is a trap many guides miss: setting only the host and protocol gives an HTTPS name, but n8n still adds its own port number, and Telegram refuses that port.
The Fix: Tunnel First, Then n8n With the Right Address
I used Cloudflare’s free quick tunnel because it needs no account and no card. Ngrok works on the same idea, and the steps below stay the same: only the command that starts the tunnel changes.
Step 1: Start the tunnel
Open a terminal, install cloudflared from Cloudflare’s downloads page, and point it at n8n’s port. Leave this window open for the whole session.
cloudflared tunnel --url http://localhost:5678After a few seconds it prints an address that ends with trycloudflare.com. Copy it. I got one on the first try, with no sign-up. Cloudflare’s docs say the name changes every time you start a new quick tunnel and that these tunnels have no uptime promise, so treat them as a learning tool.
Step 2: Start n8n with that address
Stop n8n if it is running. Start it again in a new terminal with the variable set before it starts. Add the trailing slash. Pick the line for how you run n8n.
# Mac or Linux with npx
N8N_WEBHOOK_URL=https://YOUR-NAME.trycloudflare.com/ N8N_PROXY_HOPS=1 npx n8n# Windows PowerShell
$env:N8N_WEBHOOK_URL="https://YOUR-NAME.trycloudflare.com/"
$env:N8N_PROXY_HOPS="1"
npx n8n# Docker (n8n's own image)
docker run -it --rm --name n8n -p 5678:5678 \
-e N8N_WEBHOOK_URL=https://YOUR-NAME.trycloudflare.com/ \
-e N8N_PROXY_HOPS=1 \
-v n8n_data:/home/node/.n8n \
n8nio/n8nWindows Command Prompt trap
If you use cmd and write set N8N_WEBHOOK_URL=https://x.trycloudflare.com/ && npx n8n, a space sneaks into the value. Put the quotes around the whole assignment, like set "N8N_WEBHOOK_URL=https://x.trycloudflare.com/", on its own line.
N8N_PROXY_HOPS=1 tells n8n that one proxy sits in front of it. The n8n docs ask for it whenever a proxy or tunnel is in front, and its own tunnel helper writes both settings together. Keep the Node.js version between 20.19 and 24.x if you use npx.
Step 3: Check the address before touching Telegram
Do this check once. Add a plain Webhook node to a test workflow and look at its Production URL. It should start with your tunnel name. If it still shows localhost, n8n did not receive your variable, and no Telegram setting can fix that. Go to the checklist below.
As a second proof, I published a small test workflow with a Webhook node, then sent a POST request from the public internet to the tunnel address. n8n answered with status 200. This is the same kind of request Telegram sends. I did not use a live bot token in this test, so the Telegram step itself is based on the docs above.
Step 4: Add the Telegram trigger and publish
- Create your bot with BotFather in Telegram and copy the token.
- In n8n, add a Telegram Trigger node and create a credential with that token.
- Choose the update type, such as message, and add the rest of your workflow.
- Publish (older versions say Activate) the workflow. n8n now asks Telegram to use your HTTPS address.
A published workflow is what registers the webhook. The Test button registers a different, temporary test address. That difference causes the next big problem.
Step 5: Confirm what Telegram stored
Telegram’s Bot API has a method called getWebhookInfo. Open this in a browser, with your own token in place of the placeholder, and read the url field. It should show your tunnel name. Do not paste this link in public chats, since it holds your bot token.
https://api.telegram.org/botYOUR_BOT_TOKEN/getWebhookInfoStill Failing? Match the Symptom
| What you see | Likely cause | What to do |
|---|---|---|
| Same “HTTPS URL must be provided” error | n8n never got the variable | Stop n8n fully and start it with the variable in the same terminal. Re-check Step 3 |
| Error only after a PC restart | The tunnel name changed | Start the tunnel, copy the new name, restart n8n with it, publish again |
| Docker still shows localhost | Old container kept its old settings | Remove the container and run it again with the -e lines |
| “Failed to resolve host” | Tunnel is off or the name has a typo | Check that the cloudflared window is still running and the name matches |
| Works in Test, silent after Publish (or the reverse) | Telegram keeps one webhook per bot | See the next section |
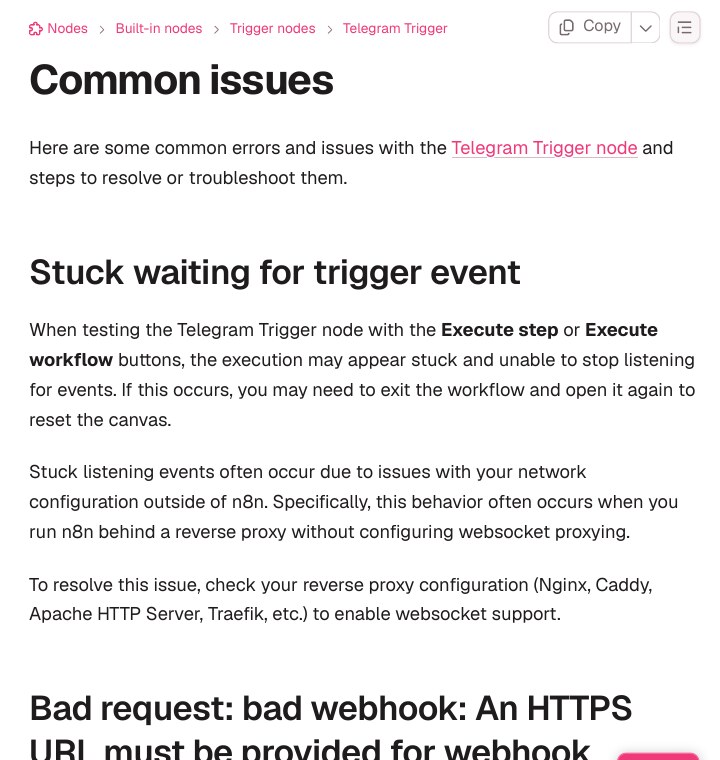
| Listening forever in the editor | Proxy without websocket support | Only for a real Nginx or Caddy proxy. Turn websockets on |
Why It Works in Test but Not After Publishing
n8n’s Telegram page explains that Telegram allows only one webhook per bot. Each time you switch between the test address and the production address, the older one is replaced. So a workflow that is published and also tested will keep stealing the webhook from itself. The simple habit: unpublish the workflow while you test, publish when you are done. Or create a second bot with BotFather just for testing, which costs nothing.
Is a Tunnel Enough for a Real Bot?
No. For learning and for demos, a quick tunnel is fine. For a bot that must answer at 3 a.m., you need an address that never changes and a machine that stays on. A student laptop that sleeps will drop the bot, and a new tunnel name means repeating the steps above. The sensible next step is a small server with a domain name, a proxy such as Caddy or Nginx that handles HTTPS, and the same N8N_WEBHOOK_URL and N8N_PROXY_HOPS=1 settings. n8n’s reverse proxy page is the place to read first.
If you only want to try an idea once, there is a different route. Telegram says you cannot use getUpdates while a webhook is set, so a workflow that asks Telegram for new messages on a schedule does not need any public address. It is more work to build, so I left it out here.
Common Mistakes
- Starting the tunnel after n8n, so n8n has no address to use.
- Writing the variable name wrong, or leaving the URL without
https://. - Using
docker restartand expecting new settings, when the container needs to be recreated. - Testing and publishing the same Telegram workflow at the same time.
- Sharing the tunnel name or the getWebhookInfo link publicly. Anyone with the tunnel name can reach your whole n8n, not only the webhooks.
Frequently Asked Questions
Do I need ngrok?
No. Any tunnel that gives a public HTTPS name works. I tested the Cloudflare quick tunnel, which needs no account.
Can I use my home IP address and a port?
Not as a plain HTTP address. Telegram needs HTTPS with a certificate that matches the name, and many Indian home connections cannot accept inbound connections anyway.
Why does the Telegram node not let me type the URL?
The node takes its address from n8n itself. That is why the setting lives in n8n’s startup variables and not in the node.
Will the free tunnel name stay the same?
No. Cloudflare says the name changes each time you create a quick tunnel, so repeat Steps 1 and 2 after every restart.
Sources & Documentation
- n8n Docs: Telegram Trigger common issues
- n8n Docs: Configure webhook URLs with reverse proxy
- n8n Docs: Endpoints environment variables
- n8n Docs: Install with Docker
- Telegram: Marvin’s Marvellous Guide to All Things Webhook
- Telegram Bot API: setWebhook
- Cloudflare Docs: Quick Tunnels
This guide was checked on October 28, 2026. Docs and menu labels change, so what you see may differ slightly.
Written & Verified by Sampath Anji
Sampath Anji is a technology researcher, systems developer, and digital creator based in Telangana, India. He specializes in on-device AI architectures, autonomous agent workflows, high-throughput inference engines, and digital media production. Every tutorial on ISMARTANJI CREATIONS is grounded in code reproducibility, verified documentation, and transparent test environments. Read our full testing methodology on our About Us page, or submit feedback and code updates via our Contact Desk.