
Short answer: your clip is probably variable frame rate (VFR) video. Phones, screen recorders and game capture tools often save it, and editors expect a fixed rate. The cure is to make a constant frame rate (CFR) copy of the clip before you edit, using HandBrake with “Constant Framerate” ticked, or one ffmpeg command.
People ask this again and again, for example in this r/premiere thread and this r/VideoEditing thread. The usual reply is “convert to CFR”. Then some people come back saying they did it in HandBrake and the clip is still out of sync. I found the likely reason in HandBrake’s own documentation, and I tested the whole fix myself on October 30, 2026.
What Is Really Going On With Your Clip
A normal video is like a train that stops at a station every 1/30 of a second. A VFR video is a train that stops only when there is something new to show. If the screen did not change, no new frame is saved. The audio keeps its own steady speed.
An editor lays clips on a fixed clock. When the frames do not arrive on that clock, it has to guess, and the guess gets worse as the clip gets longer. That is why people say “it was fine for the first minute, then it drifted”.
I made a 40 second test clip to see the size of the problem. It had 1,000 frames and 40 seconds of audio, so the average was about 25 frames per second. If an editor spreads those 1,000 frames over a fixed 30 fps grid, the picture ends at 33.3 seconds while the audio runs to 40. That is a gap of 6.7 seconds. Real editors are smarter than that, but it shows why the gap grows.
Where Indian Creators Meet This Problem
- A phone screen recording of an online class, cut into revision notes.
- BGMI or Free Fire gameplay recorded with a screen recorder, then cut for YouTube.
- A webcam or Google Meet style interview for a college fest video.
Adobe’s FAQ lists smartphones, webcams, ShadowPlay and OBS as common sources of VFR. Puget Systems says most DSLR and mirrorless cameras shoot a constant rate.
Step 1: Check If Your Clip Is VFR
Check one clip first. There are three easy ways.
- Premiere Pro: import the clip, right-click it in the Project panel, choose Properties, and look for the line “Variable Frame Rate Detected”.
- MediaInfo (free): open the file, go to View, then Tree. Under Video, “Frame Rate Mode” will say Variable or Constant.
- ffmpeg: run the two commands below.
ffprobe -v error -select_streams v:0 -show_entries stream=r_frame_rate,avg_frame_rate,nb_frames -of default=nw=1 clip.mp4
ffmpeg -hide_banner -i clip.mp4 -vf vfrdet -an -f null -
Here is what I got on my test clip. The first command printed r_frame_rate=30/1 and avg_frame_rate=30000/1199, which is about 25 fps. Two numbers that disagree this much are suspicious. The second command (the vfrdet filter, which ffmpeg’s documentation says detects variable frame rate) printed a line ending like this:
VFR:0.398398 (398/601) min: 512 max: 1024 avg: 768The number after VFR: is roughly the share of frames with uneven timing. After the fix it printed VFR:0.000000. Zero is what you want to see.
Step 2: Make a Constant Frame Rate Copy
Pick the frame rate first. Use the rate your camera or recorder was set to, usually 30, 24 or 60. If MediaInfo shows 29.97, use 30000/1001 in ffmpeg.
Option A: HandBrake (no commands)
- Install HandBrake from handbrake.fr (it is free) and open it.
- Click Open Source and choose your clip.
- On the Summary tab, set Format to MP4. Pick any normal preset, such as Fast 1080p30.
- Open the Video tab. Next to Framerate (FPS), choose your number, for example 30.
- Under it, select Constant Framerate. Do not leave it on Peak Framerate.
- Set a file name in Save As, click Start Encode, and wait.
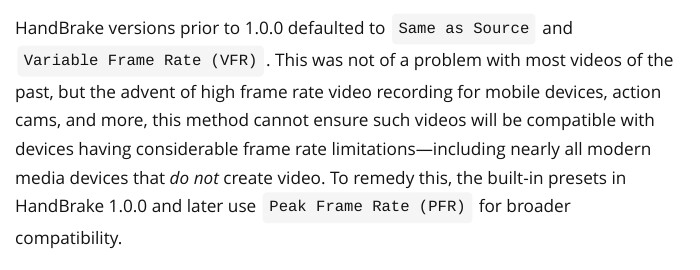
Step 5 is the whole trick. HandBrake’s documentation says its built-in presets use Peak Frame Rate. Peak keeps the frames that are slower than the limit exactly as they are, so a VFR clip stays VFR. You can run an entire encode with a preset and get a file that behaves the same way as the original.
Is Constant Framerate bad?
HandBrake’s page says it is not recommended for everyday use, but it names encoding for import into an NLE (a video editor) as a fair reason. That is your job here. Use the converted file only for editing and keep the original.
Option B: One ffmpeg command
ffmpeg -i input.mp4 -vf fps=30 -fps_mode cfr -c:v libx264 -crf 18 -preset medium -c:a copy output_cfr.mp4In plain words: fps=30 tells ffmpeg to build a fixed 30 per second grid, repeating or dropping frames where needed (the ffmpeg docs describe the fps filter this way). -crf 18 keeps quality high. -c:a copy leaves your audio alone, so only the picture is touched.
My result: the 1,000-frame clip became 1,200 frames, avg_frame_rate became 30/1, and the video and audio both measured 40.000000 seconds. Using -r 30 instead of the fps filter gave 1,199 frames in my test, so I prefer the filter. For a 29.97 clip, I used fps=30000/1001 and it gave 29.97 fps output.
A whole folder? This loop worked in my Linux test (it also runs on Mac):
for f in *.mp4; do ffmpeg -i "$f" -vf fps=30 -fps_mode cfr -c:v libx264 -crf 18 -preset medium -c:a copy "cfr_$f"; doneOn Windows, use HandBrake’s Add to Queue button instead. I did not test a Windows script.
Step 3: Edit With the Copy, Not the Original
- Import only the _cfr files into your project.
- Make the timeline frame rate match the number you chose. In Premiere, right-click the clip and choose New Sequence From Clip. In DaVinci Resolve, set it under File, Project Settings, Master Settings, Timeline frame rate before you add clips.
- Keep the originals until the video is published.
Can’t I Just Use the Editor’s Own Fix?
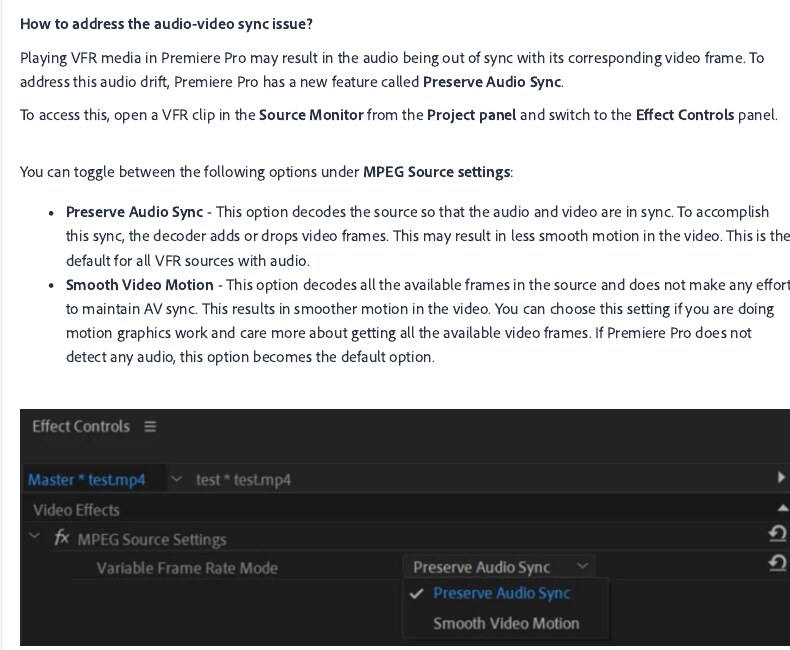
Sometimes, yes. Premiere has a switch for it. Select the clip, open Effect Controls, and look under MPEG Source Settings for Variable Frame Rate Mode. It offers Preserve Audio Sync (the default for VFR clips that have audio) and Smooth Video Motion. Preserve Audio Sync adds or drops frames to hold the sound in place, which Adobe says can make motion less smooth.
Adobe also says the switch may not work well when the gap between the slowest and fastest frame rate is large, and that proxy or transcode workflows need a CFR file from the start. So the switch is fine for a quick cut, and a CFR copy is safer for long projects.
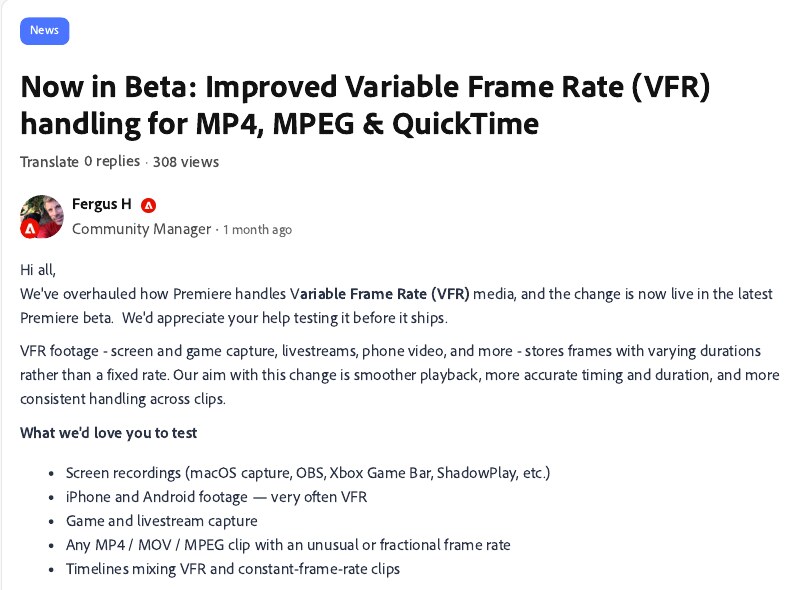
On September 24, 2026, an Adobe community manager posted that Premiere’s VFR handling was reworked and is in the beta for testing. When I read it on October 30, it was still a request for testers, not a finished release. I would not wait for it.
What About DaVinci Resolve and Other Editors?
| Editor | What I could verify | What to do |
|---|---|---|
| Premiere Pro | Has Preserve Audio Sync; Adobe still advises CFR for proxy and transcode work | Try the switch, convert if drift remains |
| DaVinci Resolve | Puget Systems says Resolve expects constant frame rate and can convert most clips, but not all (guide dated 2021) | Convert with HandBrake or ffmpeg first |
| CapCut and phone editors | I found no official statement and did not test them | Same fix is safe: convert, then import |
If It Is Still Out of Sync After Converting
1. HandBrake was left on Peak Framerate
Run the vfrdet command on the new file. If it is not near zero, the new file is still VFR. Go back to Step 2, option A, and tick Constant Framerate.
2. The sound came from a second device
If you recorded sound on a separate recorder or another phone, the drift may come from two different clocks and not from VFR. Clap once at the start and once at the end of the take. If the clap gap is different at the end, the audio is running at a slightly different speed.
As a last resort, you can stretch the sound by a tiny amount. Divide the audio length by the video length and use that number. In my test, the video was 39.8 seconds and the audio 40 seconds, so the number was 40 divided by 39.8, which is 1.005025. This command made both streams 39.8 seconds:
ffmpeg -i video_only.mp4 -i audio.m4a -map 0:v -map 1:a -c:v copy -af atempo=1.005025 -c:a aac fixed.mp4Use this only when the gap grows steadily. If it jumps around, the recording itself is damaged. One r/VideoEditing poster reported this on a two-hour webcam capture, where even a CFR re-encode left the middle part off. Then cut the file into shorter parts and sync each by hand.
3. You picked the wrong frame rate
A 24 fps clip forced to 30 gets repeated frames and uneven motion. Check the real number in Step 1 and convert again.
How to Avoid It Next Time
- Look in your camera app’s video settings for anything like auto or low-light frame rate and turn it off if you find it. I could not check this on every phone.
- Record shorter clips when you need exact sync, like interviews.
Common Mistakes
- Converting with a HandBrake preset and never touching the Framerate option.
- Deleting the original file after converting.
- Editing first and converting later. Convert first so your cuts stay put.
Frequently Asked Questions
Why does my video look fine in the phone gallery but drift in the editor?
Phone players follow the time stamp of each frame, so they show it correctly. Many editors place frames on a fixed grid, which is where the drift starts.
Does converting to CFR reduce quality?
It is a re-encode, so there is a very small loss. With -crf 18 or a high HandBrake quality, most people will not see it. If you want zero loss, an editing format like ProRes or DNxHR works, but my 40 second test file grew from 3.6 MB to about 110 MB.
Should I wait for Adobe’s beta fix?
No. It is still a beta. The CFR copy works today.
Sources & Documentation
- Adobe Community: FAQ, How to work with Variable Frame Rate (VFR) media in Premiere Pro
- Adobe Community: Now in Beta, Improved Variable Frame Rate (VFR) handling
- HandBrake Documentation: Frame rate
- FFmpeg Filters Documentation: fps and vfrdet
- MediaInfo (MediaArea)
- Puget Systems: DaVinci Resolve Initial Troubleshooting
This guide was checked on October 30, 2026. The commands were run on ffmpeg 7.1 on Linux. Menu names can change between versions.
Written & Verified by Sampath Anji
Sampath Anji is a technology researcher, systems developer, and digital creator based in Telangana, India. He specializes in on-device AI architectures, autonomous agent workflows, high-throughput inference engines, and digital media production. Every tutorial on ISMARTANJI CREATIONS is grounded in code reproducibility, verified documentation, and transparent test environments. Read our full testing methodology on our About Us page, or submit feedback and code updates via our Contact Desk.