
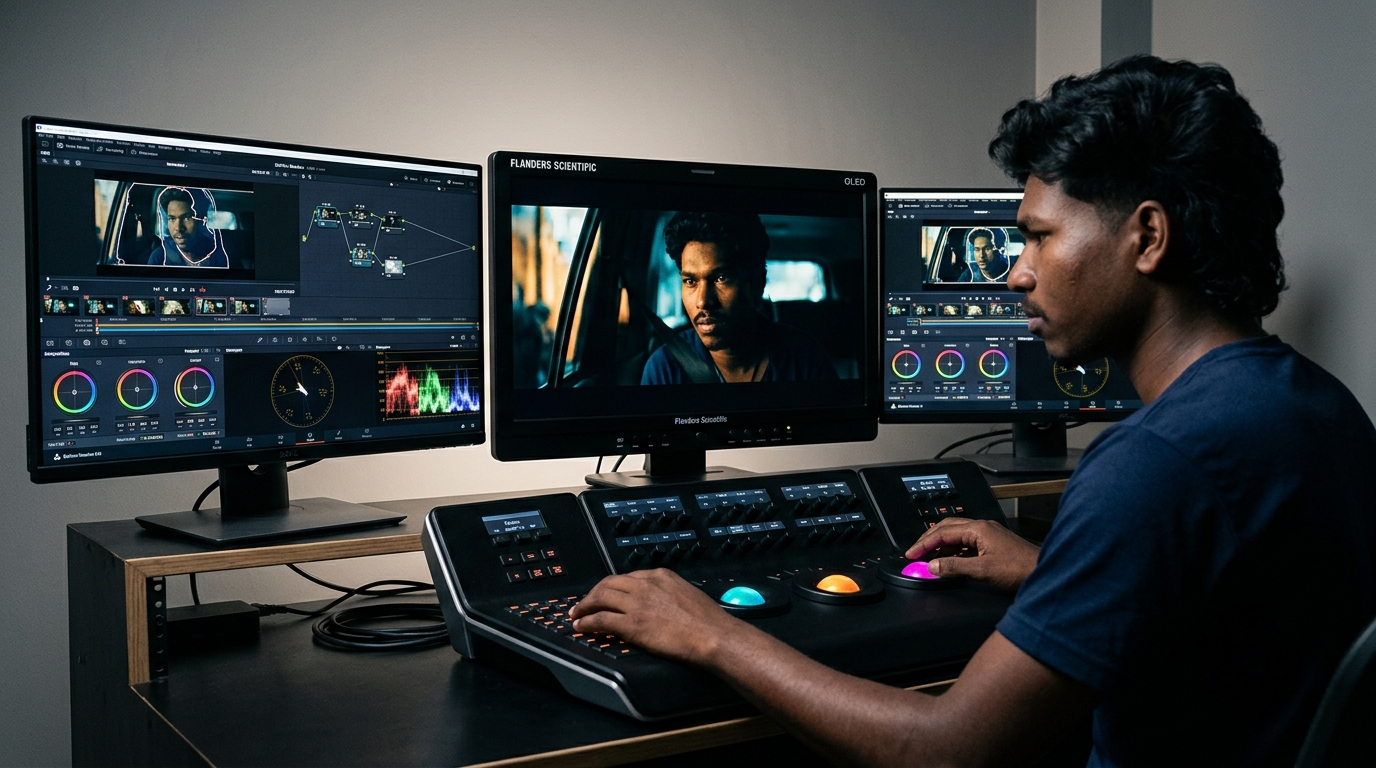
Learn how to build professional node-based AI color grading workflows in DaVinci Resolve using the DaVinci Neural Engine, Magic Mask, and Color Slice.
How to Master AI Color Grading in DaVinci Resolve in 2026
Capturing pristine digital cinema footage on modern camera systems—whether shooting 12-bit Blackmagic RAW, 16-bit Sony X-OCN, or Apple ProRes Log—provides unprecedented dynamic range and color latitude. Yet for many post-production teams and independent filmmakers, the process of translating flat, desaturated log recordings into polished, cinematic deliverables remains a painstaking bottleneck. Traditional workflows rely on manual rotoscoping, fragile HSL qualifiers, and complex power windows that frequently break whenever subjects move, lighting shifts, or camera motion introduces parallax.
The evolution of the DaVinci Neural Engine inside DaVinci Resolve Studio has fundamentally transformed digital post-production. Colorists no longer need to spend hours meticulously keyframing secondary masks to isolate talent, balance skin tones, or separate background elements. Modern neural tools—including Magic Mask 2.0, automated Depth Map estimation, Face Refinement, and Color Slice vector palettes—enable instant, motion-tracked subject isolations that adapt dynamically across temporal cuts.
However, leveraging artificial intelligence in professional color grading requires strict engineering discipline. Carelessly stacking neural tools without understanding color management, math clipping thresholds, and node processing hierarchy leads to severe image degradation: banding in shadow gradients, color edge fringing, motion-tracking drift, and crippling GPU memory bottlenecks. Mastering AI-driven color grading in 2026 requires a structured, non-destructive node tree architecture built upon broad color science.
1. Color Science Fundamentals: Why Unmanaged Workflows Break
Before placing a single neural mask or adjusting a primary lift wheel, colorists must establish a standardized color-managed foundation. The most common point of failure in modern video grading is grading in an unmanaged Rec.709 color space.
When camera sensor data is recorded in log gammas (such as Sony S-Log3, Canon Log 2, or ARRI LogC4), the recording preserves high dynamic range and wide color gamuts. If an editor simply applies contrast and saturation directly to the log image using standard video curves, the software compresses the signal into the narrow boundaries of Rec.709 display space too early in the processing chain.
This early compression causes three catastrophic issues:
- Mathematical Clipping: High-latitude highlights (such as practical lamps, skies, and skin reflections) clip irrecoverably at 100 IRE, preventing recovery in subsequent nodes.
- Unnatural Saturation Roll-Off: As colors approach peak luminance, saturated hues shift hue angles or blow out into harsh neon artifacts rather than rolling off smoothly into white as physical film emulsion does.
- Neural Tracking Degradation: Computer vision algorithms inside the DaVinci Neural Engine rely on clear contrast boundaries and edge definitions. Running neural tracking on poorly mapped, washed-out log footage degrades segmentation accuracy.
In professional environments, colorists implement either DaVinci YRGB Color Managed (RCM) or an explicit Color Space Transform (CST) node sandwich, standardizing intermediate grading operations inside DaVinci Wide Gamut (DWG) / Intermediate. This broad working space provides an expansive mathematical container where exposure, white balance, and neural isolations operate cleanly without data loss.
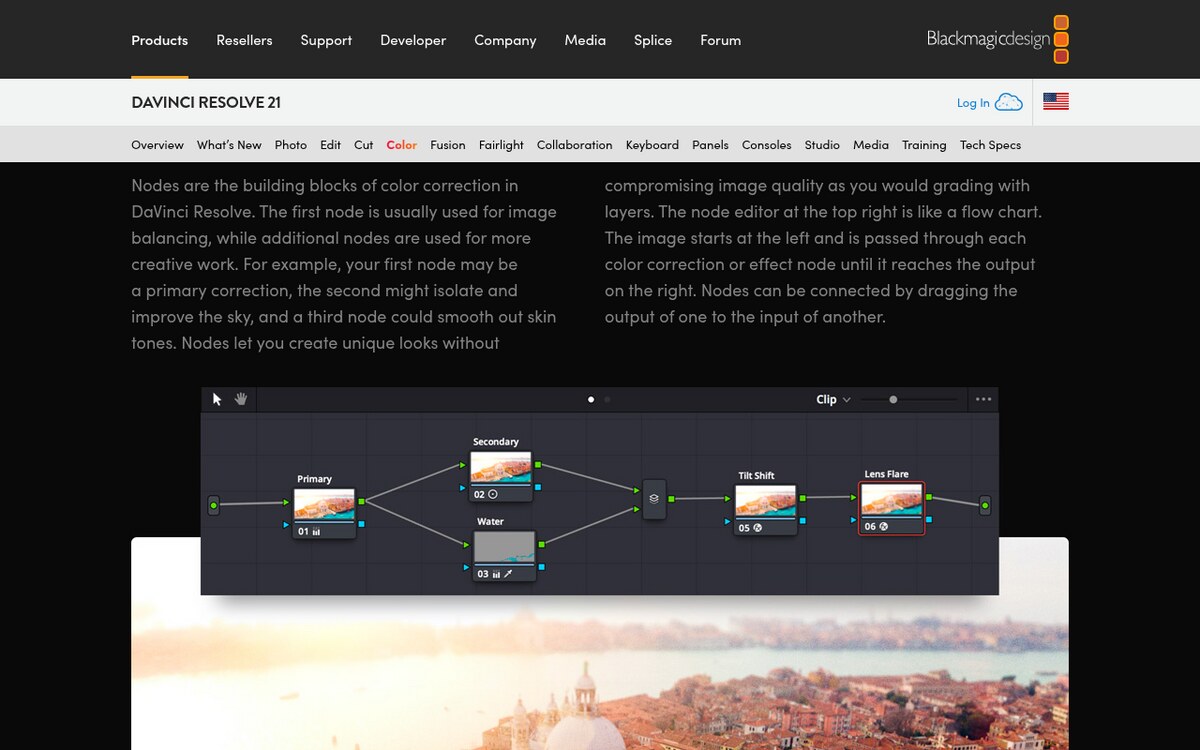
2. Core Architecture: The Standardized 8-Node Neural Pipeline
A production-grade color grading workflow relies on a fixed node tree structure. Fixed node trees guarantee that every shot on the timeline follows an identical mathematical processing order, allowing presets, shared memories, and batch neural tracking to propagate seamlessly across entire sequences.┌────────────────────────────────────────────────────────────────────────┐
│ STANDARDIZED 8-NODE NEURAL COLOR PIPELINE │
├────────────────────────────────────────────────────────────────────────┤
│ │
│ [ Camera Raw / Log Source Video (Full Dynamic Range Input) ] │
│ │ │
│ ▼ │
│ [ Node 01: Spatial & Temporal Denoise (UltraNR / Motion Analysis) ] │
│ │ │
│ ▼ │
│ [ Node 02: Exposure & Global Balance (Offset / HDR Zone Wheels) ] │
│ │ │
│ ▼ │
│ [ Node 03: Color Space Transform Input (Camera Log -> DWG/Inter) ] │
│ │ │
│ ▼ │
│ [ PARALLEL NEURAL ISOLATION LAYER (Nodes 04, 05, 06) ] │
│ ├─► [ Node 04: Magic Mask 2.0 (Subject & Wardrobe Isolation) ] │
│ ├─► [ Node 05: Depth Map (Foreground / Background Atmosphere) ] │
│ └─► [ Node 06: Face Refinement (Eyes, Skin Tone, Lip Contour) ] │
│ │ │
│ ▼ │
│ [ Parallel Mixer: Merges Neural Secondary Grades Non-Destructively ] │
│ │ │
│ ▼ │
│ [ Node 07: Color Slice Vector Palette (Skin Tone & Palette Unity) ] │
│ │ │
│ ▼ │
│ [ Node 08: CST Output & Film Print Emulation (DWG -> Rec.709 2.4) ] │
│ │ │
│ ▼ │
│ [ Calibrated Master Display / Export Delivery Pipeline ] │
│ │
└────────────────────────────────────────────────────────────────────────┘
3. Toolset Deep Dive: Mastering the DaVinci Neural Engine
DaVinci Resolve Studio integrates an array of deep-learning computer vision models designed specifically for high-fidelity video manipulation. Understanding when and how to deploy each tool prevents over-processing and preserves organic image texture.
1. Magic Mask 2.0: Neural Segmentation for Talent and Wardrobe
Magic Mask leverages a specialized neural network trained on millions of segmentation masks to distinguish human figures, specific body parts (face, hair, arms), and clothing items.
- Best Practice: Set the mask mode to Intuitive Brush, stroke across the primary actor with a single green foreground stroke, and run bi-directional tracking. If the subject crosses behind foreground obstacles, avoid painting multiple overlapping strokes; instead, switch to Stroke Mode to paint targeted red exclusion strokes on the obstructing geometry.
- Matte Refinement: Never use raw neural edges. Expand the mask radius by +2 to +4 pixels, apply a clean Gaussian blur of 5 to 8 pixels, and calibrate Clean Black/Clean White thresholds to eliminate digital fringing along hair contours.
2. Depth Map: Simulating Volumetric Atmosphere and Z-Depth
The Depth Map tool analyzes monocular 2D video frames, predicting relative geometric distance from the camera lens to create a continuous 32-bit floating-point depth matte.
- Creative Application: Isolate deep background architecture to introduce subtle haze, reduce background saturation, or lower exposure by 0.5 stops. This introduces genuine cinematic depth of field and visual separation without requiring complex lighting setups on set.
- Threshold Tuning: In the Depth Map palette, enable Invert if targeting background elements, and adjust the Near Limit and Far Limit sliders to restrict adjustments strictly to background planes beyond 15 feet.
3. Face Refinement: Automated Portrait Retouching
Face Refinement automatically detects facial geometry, mapping tracking meshes over foreheads, cheeks, eyes, lips, and jawlines.
- Operational Guardrail: Avoid heavy automated smoothing presets. Instead, use Face Refinement primarily for subtle eye brightening (+0.10 Relight), gentle skin texture softening (Beauty threshold set below 0.25 to prevent a waxy, plastic sheen), and dedicated lip tinting.
4. UltraNR: Temporal Noise Reduction without Ghosting
Introduced in Resolve 19, UltraNR utilizes neural temporal analysis to distinguish true high-frequency image detail (such as fabric weave, hair strands, and skin pores) from random sensor noise.
- Placement Rule: UltraNR must always reside on Node 01. Running noise reduction after aggressive contrast curves amplifies noise artifacts, forcing the neural engine to work harder and increasing the risk of motion ghosting.
4. Architectural Comparison: Color Grading Systems Compared
Different post-production ecosystems approach automated color correction and neural enhancement through distinct architectural models:
| Evaluation Vector | DaVinci Neural Engine (Resolve Studio) | Adobe Premiere Pro (Lumetri AI) | Standalone AI Color Plugins |
|---|---|---|---|
| Color Management Backbone | 32-bit floating-point DaVinci Wide Gamut (DWG) & ACES | Mixed 32-bit; primarily display-referred Rec.709 | Dependent on host NLE color engine |
| Tracking Architecture | Deep-learning optical flow with bi-directional vectors | Basic point and planar tracking | Variable; often limited to frame-by-frame analysis |
| Spatial Depth Estimation | Native hardware-accelerated Depth Map generation | Not available natively | Requires external depth mapping software |
| Color Palette Separation | Dedicated 6-vector Color Slice palette with custom roll-off | Basic HSL secondary curves | 3-way color wheels with qualifier masks |
| GPU Acceleration | Metal, CUDA, and ROCm with Tensor Core optimizations | OpenCL and CUDA acceleration | CPU bound or unoptimized GPU implementations |
| Production Ecosystem | Industry standard for Hollywood theatrical DI & episodic TV | Ideal for fast-turnaround commercial and web content | Supplementary tool for niche stylistic adjustments |
5. Step-by-Step Implementation: Building the Production Grade
Follow this practical, repeatable configuration to grade high-dynamic-range log footage using Resolve’s neural tools.
Phase 1: Project Setup and Color Management
- Open Project Settings (Shift + 9) and navigate to Color Management.
- Set Color Science to DaVinci YRGB (unmanaged if using manual CST nodes) or DaVinci YRGB Color Managed.
- If using manual CSTs (the industry standard for precise node control), set Timeline Color Space to DaVinci WG/Intermediate and Output Color Space to Rec.709 Gamma 2.4.
Phase 2: Building the Node Sandwich
- Create Node 03 and Node 08 on your timeline clip.
- On Node 03, apply an OpenFX Color Space Transform:
- Input Color Space: Your camera profile (e.g., Sony S-Gamut3.Cine).
- Input Gamma: Your camera log format (e.g., Sony S-Log3).
- Output Color Space: DaVinci Wide Gamut.
- Output Gamma: DaVinci Intermediate.
- On Node 08, apply the complementary CST:
- Input Color Space: DaVinci Wide Gamut.
- Input Gamma: DaVinci Intermediate.
- Output Color Space: Rec.709.
- Output Gamma: Gamma 2.4 (or Rec.709-A for macOS QuickTime parity).
- Tone Mapping Method: DaVinci (Smooth roll-off).
Phase 3: Applying Neural Isolations in Parallel
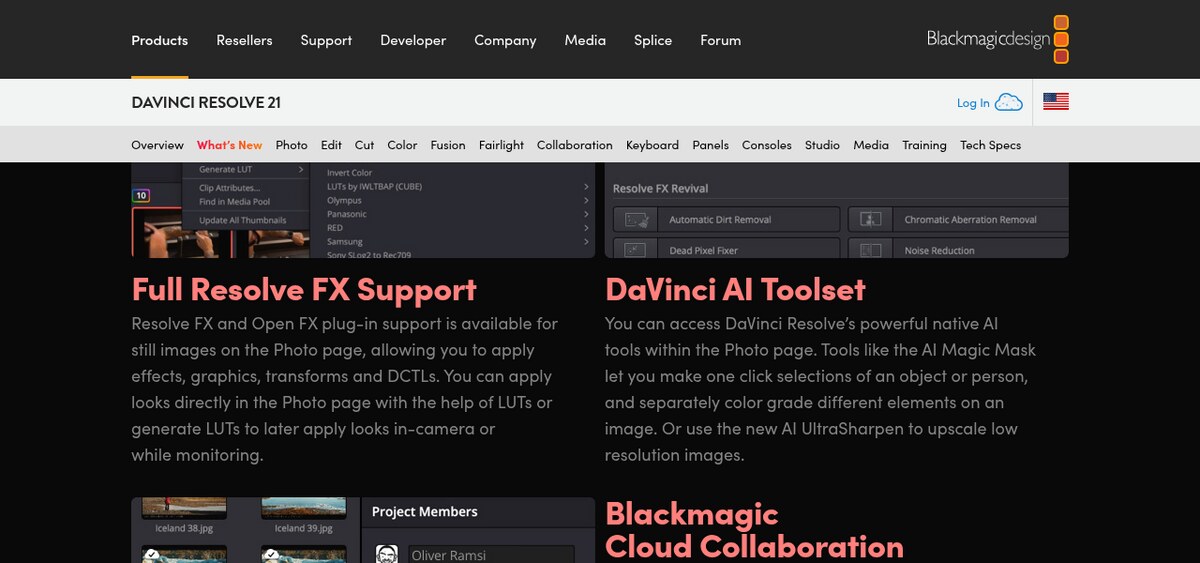
- Select Node 03, right-click, and select Add Node -> Add Parallel. Repeat to create three parallel branches (Nodes 04, 05, and 06) feeding into a Parallel Mixer before Node 07.
- Node 04 (Subject Isolation): Select the Magic Mask palette. Click the actor’s clothing and face with the Intuitive Brush. Press the Track Forward and Backward button. Once tracking completes, use the Primary Wheels Offset to lift shadows or cool down ambient exposure on the talent.
- Node 05 (Atmospheric Depth): Add the Depth Map effect. Check the Preview Matte box, adjust the Far Limit to isolate the background, and uncheck Preview Matte. In the primary wheels, reduce saturation by 15% and drop gain slightly to emphasize environmental depth.
- Node 07 (Color Slice Palette): Open the Color Slice palette. This six-vector wheel isolates Skin, Cyan, Green, Yellow, Magenta, and Red vectors with dedicated center and saturation controls. Use the Skin wheel to align facial tones perfectly with the vector scope skin-tone indicator without affecting background warmth.
6. Real-World Colorist Traps and Production Gotchas
When applying AI color grading tools under strict delivery deadlines, colorists frequently encounter four operational traps:
- Temporal Noise Reduction VRAM Exhaustion: Neural noise reduction models (like UltraNR) cache multiple preceding and subsequent frames in high-speed GPU memory to compute motion vectors. On timelines with 6K or 8K RAW media, stacking UltraNR with multiple Magic Masks can easily overwhelm 16GB or 24GB GPU VRAM buffers, triggering CUDA out-of-memory crashes. Solution: Right-click Node 01 and select Render Cache Node Output to lock in the noise reduction pass as a background ProRes 4444 render.
- Tracking Drift on Fast Cuts and Occlusions: Magic Mask tracking can lose boundary accuracy during rapid camera pans or when an actor passes behind a dark foreground object. Never trust automated tracking blindly. Always scrub through the clip with Highlight Mode (Shift + H) enabled to verify matte boundaries across every frame.
- Color Fringing from Over-Sharpening Secondary Mattes: Applying aggressive contrast adjustments inside a neural mask with hard edges produces an obvious halo artifact around subjects. Always apply a 4 to 8 pixel Blur Radius on your mask qualifiers to allow adjustments to blend organically with the surrounding scene illumination.
- Tone Mapping Double-Transforms: If your project settings are set to DaVinci YRGB Color Managed, adding manual Color Space Transform plugins on your node tree applies the transform twice. This crushes shadow detail and clips highlights violently. Choose one color management paradigm per project and adhere to it strictly.
7. Recommended Reading & Internal Guides
Expand your digital media creation and software engineering knowledge with related production blueprints on ISMARTANJI CREATIONS:
- How to Build Autonomous Browser Agents with Playwright in 2026 — Master automated web perception, headless browsers, and visual testing workflows.
- SGLang vs vLLM in 2026: The High-Throughput Serving Showdown — Explore low-latency inference architectures powering modern deep learning and neural models.
- Agentic RAG Architecture in 2026: The Ultimate Developer Guide — Build resilient knowledge retrieval pipelines with dynamic query routing.
- How to Master Essential Model Context Protocol in 2026 — Connect production tools directly to standardized AI agent backends.
8. Frequently Asked Questions (FAQ)
1. What is the difference between DaVinci Neural Engine tools in the free version versus Studio?
While the free version of DaVinci Resolve includes essential primary wheels, basic curves, and manual qualifier masks, the advanced AI-driven tools—including Magic Mask, Depth Map, Face Refinement, UltraNR neural noise reduction, and Speed Warp optical flow—are strictly exclusive to DaVinci Resolve Studio.
2. Why should Color Space Transforms be placed before and after neural masks?
Placing a Color Space Transform at Node 03 (converting camera log into DaVinci Wide Gamut) and Node 08 (converting DWG into Rec.709 display space) creates a wide-gamut floating-point sandbox. All intermediate neural isolations, contrast adjustments, and secondary color balances occur inside this linear working space, preventing mathematical signal clipping and chromatic distortion.
3. How does Color Slice differ from standard HSL curves?
Standard HSL curves isolate color based on strict hue, saturation, and luminance thresholds, often creating harsh digital grain and noisy edge artifacts along color boundaries. Color Slice uses specialized broad vector mathematics with soft saturation and density roll-offs, allowing colorists to reshape complex palettes (such as skin tones or foliage greens) smoothly without introducing qualifier noise.
9. Actionable 5-Step Implementation Checklist
- Step 1: Calibrate Project Color Science — Establish DaVinci Wide Gamut / Intermediate as your timeline working space using a non-destructive CST node sandwich.
- Step 2: Establish Denoising on Node 01 — Apply UltraNR or temporal noise reduction as the very first operation on your RAW clip and cache the node output.
- Step 3: Normalize Base Balance and Exposure — Set global contrast and white balance on Node 02 using the Offset wheel before generating any secondary masks.
- Step 4: Deploy Magic Mask and Depth Isolations in Parallel — Use parallel node branches to isolate talent, wardrobe, and atmospheric background layers independently.
- Step 5: Harmonize Palettes with Color Slice — Adjust skin tones and primary scene hues using the Color Slice vector wheels, verifying accuracy on your vector scope.
Join the Discussion: What is your preferred node architecture for high-end color grading? Have you integrated Magic Mask 2.0 or Depth Map into your episodic or commercial pipelines? Share your post-production workflows and questions in the comments below, and explore our complete library of creative guides at ISMARTANJI CREATIONS.
Sources & Further Reading
Written & Verified by Sampath Anji
Sampath Anji is a technology researcher, systems developer, and digital creator based in Telangana, India. He specializes in on-device AI architectures, autonomous agent workflows, high-throughput inference engines, and digital media production. Every tutorial on ISMARTANJI CREATIONS is grounded in code reproducibility, verified documentation, and transparent test environments. Read our full testing methodology on our About Us page, or submit feedback and code updates via our Contact Desk.